Description
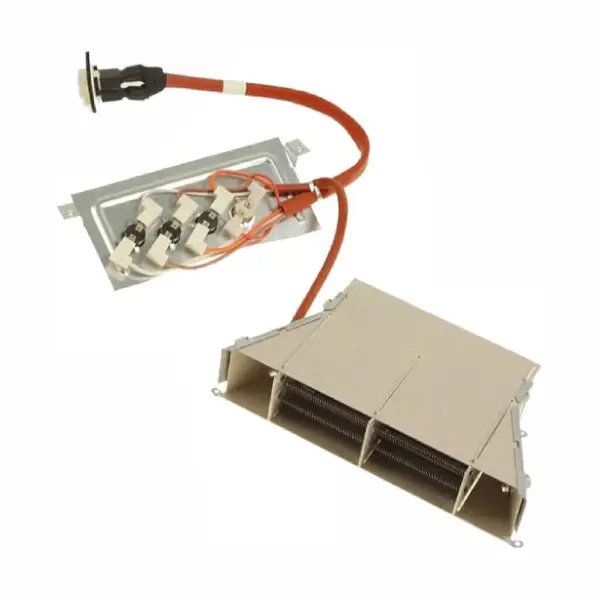
Original 2400W heating element for Whirlpool C00620174 tumble dryer
Original Whirlpool ceramic heating element C00620174 (488000620174), power 2400W, voltage 230V, dimensions 116x208x40 mm with integrated thermostat. Designed for AWZ and YTCM/YTM series dryers. Resolves problems where the dryer runs but does not heat, as well as long drying cycles that do not end. Original part only – not an unapproved replacement.
The dryer is running but the laundry comes out wet? This is almost always a fault in the heating element. Replace the original element C00620174 – and save yourself an expensive service call. It is recommended to verify compatibility with the appliance model before ordering.
Why is the dryer not heating – and what does C00620174 solve?
The heating element is the heart of any hot dryer. When it burns out – the dryer continues to spin the drum, but the air remains cold. The laundry does not dry, the cycle is prolonged, and sometimes ends without the clothes having dried at all. The C00620174 body is the part that returns the heat.
In the experience of our technicians, about 75% of the times when a Whirlpool dryer stops heating – the problem is in the heating element alone. The thermostat integrated into this element adds additional protection against overheating, so installing a genuine part – and not an unapproved replacement – is important for the long-term safety of the appliance.
📋 Technical specifications
| attribute |
value |
| Manufacturer's SKU |
C00620174 |
| Extended SKU |
488000620174 |
| brand |
Whirlpool |
| power |
2400W |
| Tension |
230V |
| Length |
208 mm |
| width |
116 mm |
| depth |
40 mm |
| Type |
Ceramic heating element with integrated thermostat |
| Device type |
Tumble dryer (hot drying) |
✅ Verified compatible models
| brand |
model |
| Whirlpool |
AWZ 8CDS/D |
| Whirlpool |
AWZ 8CD |
| Whirlpool |
AWZM 8713 |
| Whirlpool |
YTCM088B-EU |
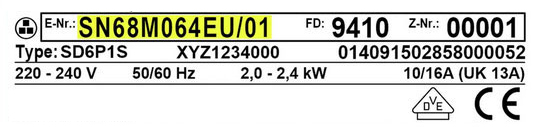
⚠️ Important: This list is partial. Before ordering – check the model sticker (E-Nr) on the inside of the dryer door and verify compatibility. It is recommended to call for confirmation of compatibility.
🔧 How do you replace a heating element in a Whirlpool dryer?
Difficulty level: Medium – requires dismantling the back of the device. Recommended for a technician with experience in home electrical work. Estimated time: 45-60 minutes. Tools: Phillips screwdriver, flathead screwdriver, multimeter for testing.
Replacement steps:
- Unplug the dryer completely. – Mandatory before any action.
- Remove the back panel (4-6 screws).
- Locate the heating element – usually on the lower right side of the inner box.
- Disconnect the electrical wires from the old body (take a picture before disconnecting).
- Loosen the retaining screws and remove the old body.
- Insert the new body C00620174 and connect the wires according to the photo.
- Reassemble in reverse order and check operation.
⚠️ Safety Warning: Replacing a heating element involves working with electrical components. If you have no previous experience, contact a qualified technician.
💡 Tip from the experts
Before you order – check the thermostats too. When our technicians arrive to repair a dryer that isn’t heating, the first thing they check is not only the heating element – but also the bimetallic thermostat located next to it. In 30% of cases, the element is fine, but the thermostat is burned out. A quick check with a multimeter saves ordering an unnecessary part.
Original heating element C00620174 comes with an integrated thermostat - a significant advantage over non-approved parts that sometimes come without this component.
❓ Frequently Asked Questions
The dryer is running but the laundry is not drying – is the problem with the heating element?
Usually yes. When the drum spins but the laundry comes out wet, the most common cause is a burnt heating element. A test with a multimeter (continuity test) will confirm the diagnosis before ordering the part. If the element is burnt – C00620174 is a direct original replacement.
Can I replace a heating element in a dryer myself – without a technician?
Self-replacement is possible for those with basic experience in home electrical work. Disassembly only requires removing the back panel, but working with electrical components requires caution. If you have no previous experience, it is recommended to contact a qualified technician.
How long does the replacement take?
An experienced technician can complete the replacement in 45-60 minutes. For someone who is dealing with this for the first time, expect an hour to an hour and a half. The most complex operation is locating the body inside the device and documenting the wire connections before disconnecting.








 Plrom Electra service