Description
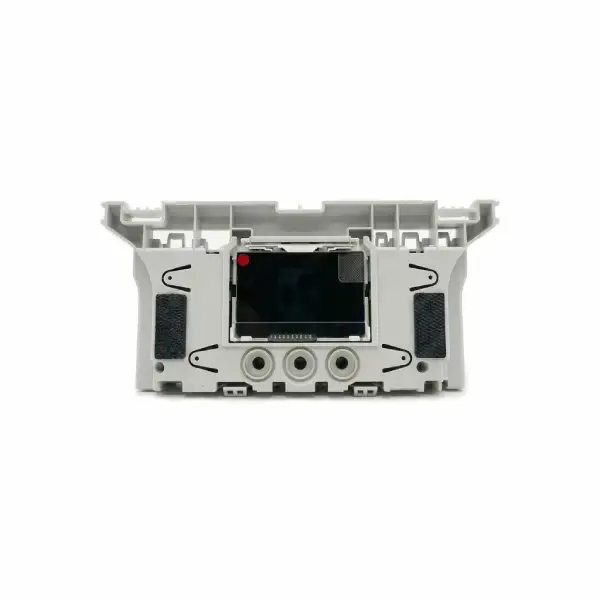
Original timer clock for Miele oven Miele 11965232
The original EZT 7751 clock timer (part number 11965232) is the electronic control module responsible for timing cooking in Miele ovens. The part is designed for a 200-240V network and restores the oven's ability to automatically turn on, display the time, and pre-program. As an original Miele part, it meets the same quality standards as the appliance itself.
An oven whose clock has stopped working – will not allow scheduled operation, will not display the time, and in some models will not allow operation at all . If your Miele oven is stuck on an error display, the time is flashing and not resetting, or the timer functions are not responding – this part is likely the cause. Check compatibility with your model before ordering.
What causes a Miele oven timer to malfunction?
The timer module is exposed to continuous heat over the years. In the experience of our technicians, this component tends to fail after repeated voltage drops or power outages – as its internal capacitors are responsible for keeping time even in the absence of power. When they discharge beyond a threshold, the entire module stops functioning. The most common sign: the time resets itself after every short power outage.
✅ The time is not displayed or flashing and does not reset.
✅ Automatic timer programming does not work
✅ The oven does not turn on in pre-set mode
✅ The timer buttons do not respond at all
✅ Error message related to the clock system
📋 Technical specifications
| attribute |
value |
| Manufacturer's SKU |
11965232 |
| Component name |
EZT 7751 |
| brand |
Honey |
| Tension |
200-240V |
| Device type |
Built-in baking oven |
| originality |
Original Miele part |
✅ Compatible models
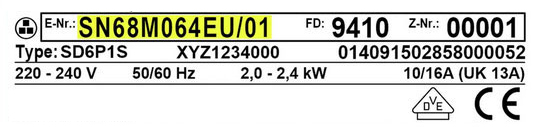
⚠️ Important: The exact list of compatible models for this part number requires verification against your appliance's model number (E-Nr). The model sticker on Miele ovens is usually located in the door frame - on the inside left or right side.
We recommend contacting us with the model number for full verification before placing your order.
🔧 Can I replace the timer myself?
Replacing a timer module in a Miele oven is a pro-level job – requiring a certified technician . The component is built into the front control panel of the oven, and connecting it involves opening the electrical panel and working with voltage. In our technicians’ experience, the replacement itself takes 30-45 minutes for an experienced technician.
⚠️ Warning: It is forbidden to carry out electrical work on a household appliance without disconnecting it from the mains and without appropriate training. Miele expressly states that repairing electrical parts requires a qualified technician in accordance with local safety regulations.
💡 Tip from the experts
Before ordering the component, perform a full reset of the oven – unplug it for at least 10 minutes. In 20% of the cases we see in the field, the timer is not broken but “stuck” due to a sharp voltage drop. If after the reset the oven works properly again – there is no need to replace parts. If the fault recurs – it is time to replace the timer module.
❓ Frequently Asked Questions
Why won't my Miele oven turn on when the timer is broken?
Some Miele ovens require an active time to be set as a condition for operation. When the timer module is not functioning, the appliance is “locked” and will not operate. Replacing the original timer module will usually unlock the lock and restore the oven to full operation.
What is the difference between an original Miele timer and an unapproved replacement?
An original Miele timer meets the exact specifications required – voltage, frequency, internal communication protocol. An unapproved replacement may cause malfunction of the user interface, inaccuracy in keeping time, and in some cases – incompatibility that prevents operation at all. Choosing an original part saves an additional technician visit.
How do you find the model number of a Miele oven?
The model sticker (E-Nr) is located on the inner door frame of the oven – open the door and look at the side or top edge of the frame. The E-Nr usually starts with an H followed by 4-5 digits. With this number we can verify full compatibility of the part.








 Plrom Electra service